How to Block Websites on iPad: 5 Effective Methods

The internet is a great resource, but it’s also full of distractions and inappropriate content — especially for kids. If you want to create a safer and more focused browsing experience, learning how to block websites on an iPad is essential.
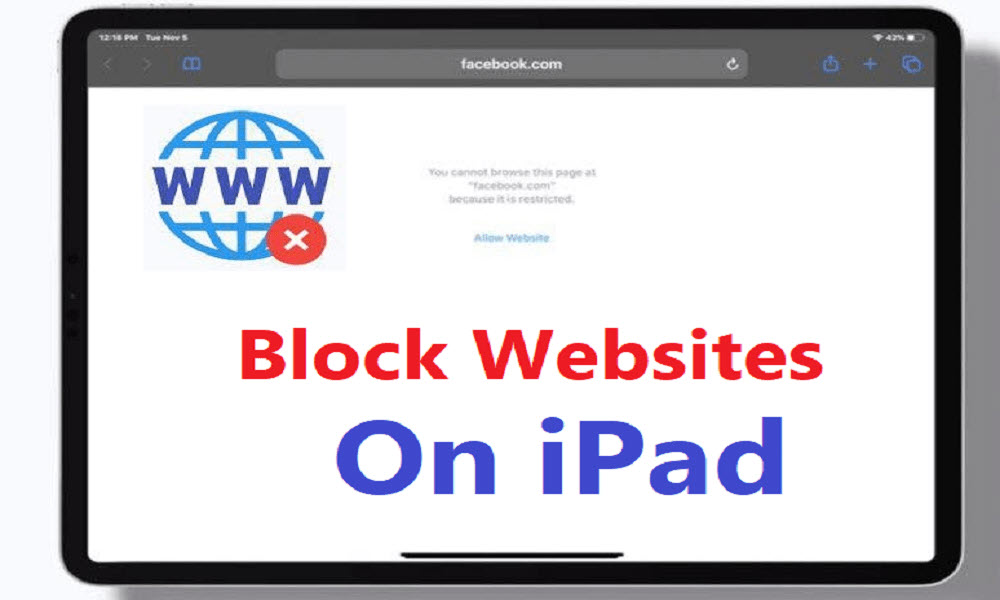
The Growing Popularity of iPads and the Importance of Website Blocking
As iPads continue to dominate the tablet market, they are widely used for work, education, and entertainment.
However, unrestricted internet access can pose security risks and distractions, especially for children and students. Implementing website blocking on iPads helps enhance online safety, improve productivity, and ensure a secure browsing experience for all users.

In this article, we’ll walk you through seven practical methods to block websites on your iPad.
Understanding Apple’s Approach to Website Blocking on iPad
Apple has always prioritized user privacy and security, especially when it comes to parental controls and content restrictions. With tools like Screen Time, parents can effectively block websites on iPads, manage app usage, and set time limits for better digital well-being.
Despite restrictions, Apple continues to support third-party apps that comply with privacy standards while helping users block websites on iPad.
Whether through built-in iOS settings, DNS filtering, or safe third-party solutions, parents can still protect their children from inappropriate content without compromising security.
1. Using Screen Time to Block Websites
Every 39 seconds, an online attack occurs, and more than 12 million children are exposed to cyber risks in the US alone (PassiveSecrets).
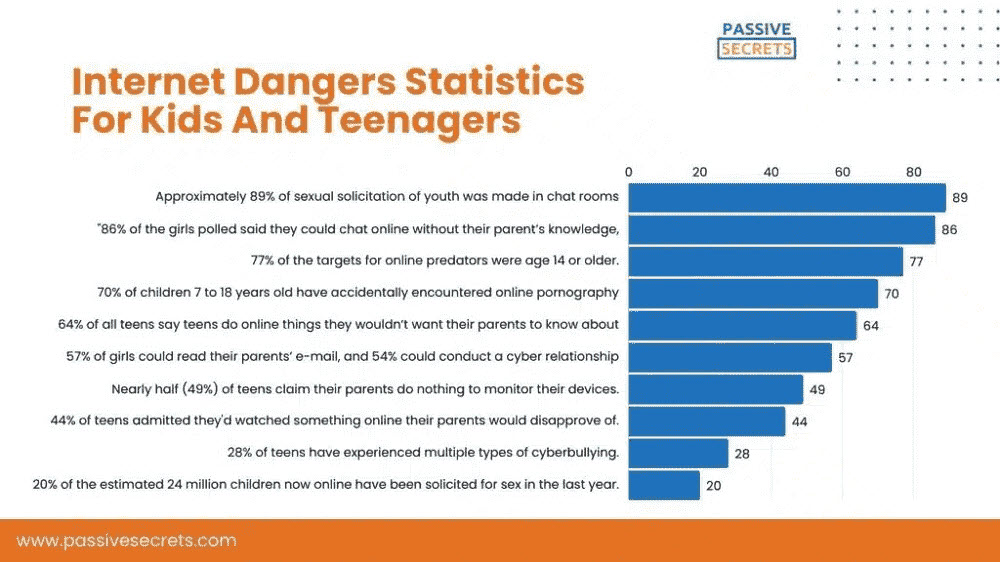
Screen Time offers a simple and effective way to manage website access on an iPhone. Let’s start by setting up the necessary restrictions to block unwanted content.
1.1. Enabling Screen Time Restrictions
Apple’s Screen Time feature offers a simple and built-in way to block websites on your iPad. This method works seamlessly within iOS settings.
Steps to Enable Screen Time:
- Go to Settings > Screen Time and tap Turn On Screen Time if it’s not already enabled.
- Choose Use Screen Time Passcode and set a passcode to prevent changes to the settings.
- Tap Content & Privacy Restrictions and toggle it on.
Advantages:
- Integrated into iOS
- Free and easy to set up.
- Works across Safari and other browsers.
Disadvantages:
- Limited filtering options.
- The passcode can be guessed if not kept secure.
1.2. Blocking Specific Websites
Once Screen Time is enabled, you can block individual websites by adding them to a restricted list.
How to Block Specific Websites:
- In Content & Privacy Restrictions, tap Content Restrictions > Web Content.
- Choose Limit Adult Websites.
- Under Never Allow, tap Add Website, and enter the URL of the site you want to block.
This method works best when you know the exact websites you want to restrict.
1.3. Limiting Adult Content Automatically
In Canada, the prevalence of internet usage among youth is notably high, with 99% of young Canadians aged 15 to 24 reporting internet use in 2022.
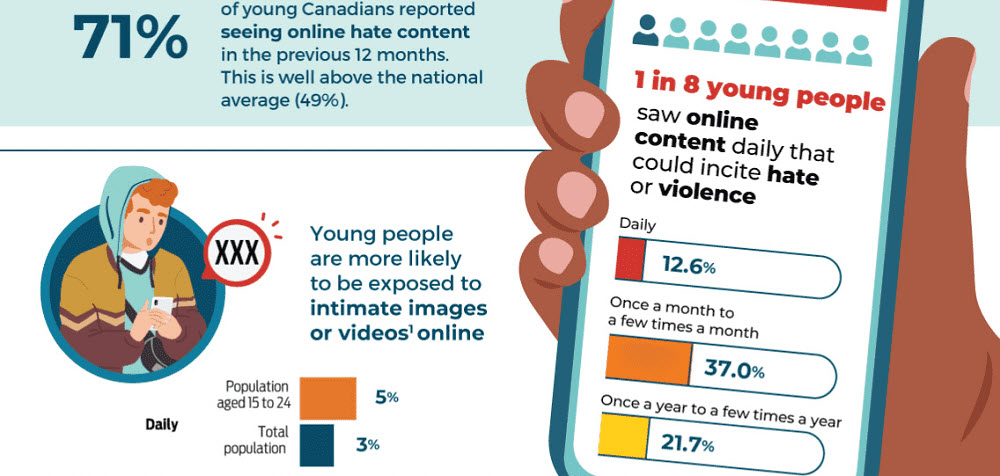
Alarmingly, 71% of these young users encountered online hate content in the previous 12 months, a rate significantly higher than the national average of 49%. Furthermore, 12.6% of young people reported daily exposure to content that could incite hate or violence.
If you want to block inappropriate content without specifying individual websites, Screen Time offers an automatic content filter.
How to Enable:
- Go to Settings > Screen Time > Content Restrictions.
- Choose Web Content > Limit Adult Websites.
This feature blocks many known adult sites automatically, though some may slip through.
1.4. Allowing Only Specific Websites (Whitelist Mode)
For maximum control, you can allow access only to a specific list of approved websites. This mode is great for child-friendly browsing but can feel restrictive for older users.
How to Set Up:
- Under Web Content, select Allowed Websites Only.
- Add the sites you want to allow, and all others will be blocked.
2. Blocking Websites on Safari via Router or DNS Settings
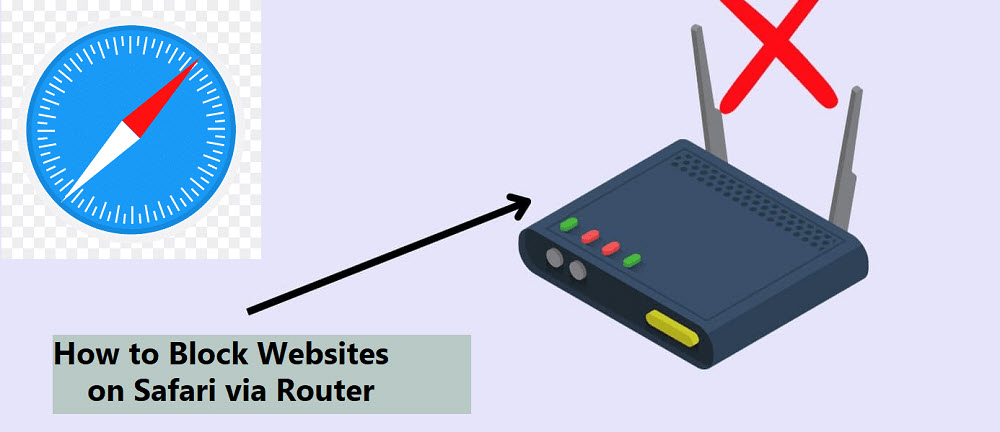
Using a Router’s Parental Controls
Many modern routers allow you to block websites across all connected devices, including your iPad.
How to Use Router Settings:
- Access your router’s admin panel (check your router’s manual for instructions).
- Find the Parental Controls or Web Filtering section.
- Add the URLs you want to block.
This method blocks websites on your entire home network, not just the iPad.
3. Blocking Websites on Google Chrome (if Safari is Not Used)

Given these statistics, it becomes imperative for parents, educators, and guardians to utilize tools and methods to block harmful websites on devices like iPads.
By doing so, they can help mitigate the exposure to detrimental online content and ensure a safer digital experience for younger users.
Using Google Family Link for Website Restrictions
If your child uses Chrome on their iPad, Google’s Family Link provides another option for website blocking.
How to Use Family Link:
- Download the Google Family Link on your own device.
- Set up a supervised account for your child.
- Manage Chrome browsing settings, including website restrictions.
4. Alternative Workarounds for Blocking Websites
If you’re looking for ways to block websites without installing additional apps, there are a few built-in iPhone features that can help. These options provide temporary control over device usage.
1. Using Guided Access for Temporary Control
Guided Access locks your iPad to a single app, preventing web browsing entirely.
How to Enable:
- Go to Settings > Accessibility > Guided Access.
- Turn on Guided Access and set a passcode.
- Start a Guided Access session when using a specific app.
2. Blocking Websites via iPad’s Hosts File (Advanced)
For advanced users, editing the hosts file can block websites system-wide.
Caution: This method requires jailbreaking your iPad, which voids warranties and risks security issues.
5. Using Third-Party Apps for Website Blocking
While Apple’s built-in tools like Screen Time offer solid website blocking capabilities, sometimes you need a more advanced and flexible solution — and that’s where third-party apps like SafeMyKid come into play.
SafeMyKid stands out as a leading parental control app, offering comprehensive digital monitoring and real-time insights, making it an excellent choice for creating a safer browsing environment on your child’s iPad.
In this section, we’ll explore why SafeMyKid is a preferred choice, its standout features, how to set it up on an iPad, and why it outshines traditional parental control methods.
5.1 Why SafeMyKid Is the Best Choice for You
SafeMyKid is more than just a website blocker — it’s a complete digital monitoring solution. Unlike Apple’s Screen Time, SafeMyKid offers a wide range of features that ensure your child’s online safety while promoting responsible internet usage.
Here’s what makes SafeMyKid a top recommendation:
- Comprehensive Monitoring: Tracks online activities across apps, websites, and messages.
- Real-Time Alerts: Notify parents immediately about potential risks.
- Cross-Platform Support: Works seamlessly on both iOS and Android devices.
- No Jailbreaking Required: Unlike some monitoring tools, SafeMyKid doesn’t require rooting or jailbreaking the device, keeping your child’s device warranty intact.
5.2 Key Features of SafeMyKid for Blocking Websites on iPad
Let’s take a closer look at the powerful features that make SafeMyKid an ideal third-party solution for website blocking:
- Website Blocking
- App & Browser Filtering
- Time-Based Website Restrictions
- Real-Time Monitoring & Alerts
- Remote Control & Customization
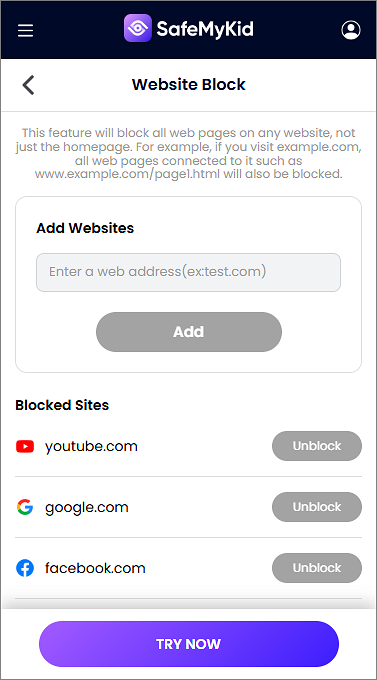
SafeMyKid offers a highly customizable website-blocking feature. Parents can block specific websites or entire categories like adult content, gambling, or violent sites. This ensures children only access safe and educational content, helping them stay focused and protected.
SafeMyKid allows parents to restrict web access by blocking specific browsers or limiting internet usage to approved apps. This prevents children from bypassing restrictions using unauthorized browsers.
With SafeMyKid, parents can set schedules for website access, allowing certain sites during homework hours while blocking distractions like gaming or social media during study time.
SafeMyKid provides real-time monitoring and instant alerts when restricted websites are accessed or attempted. This helps parents stay informed about their child’s online activities.
Parents can remotely update website restrictions, add new blocked sites, or adjust settings anytime through an easy-to-use dashboard, ensuring continuous protection without needing physical access to the device.
5.3 How to Set Up SafeMyKid to Block Websites on iPad
Download and install SafeMyKid on the iPad by following the on-screen instructions. You’ll need to grant necessary permissions for monitoring.
Setting up SafeMyKid on your child’s iPad is simple and straightforward. Follow these steps to get started:
Step 1. Create an Account
Visit the SafeMyKid website and register your free account using a valid email address.

Step 2. Connect the Device
Enter the Apple ID and password of the target device to sync it with the SafeMyKid dashboard.
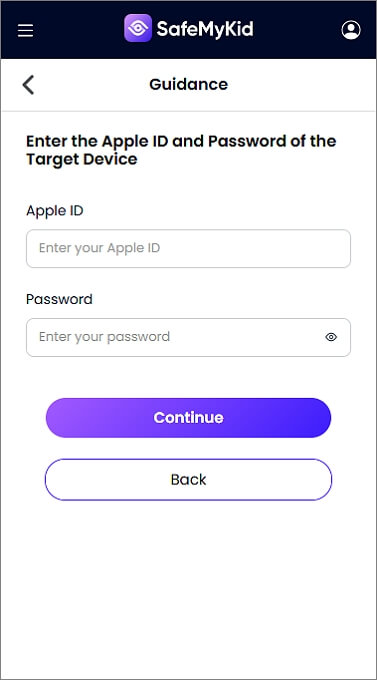
Step 3. Start Blocking Websites on iPad
Access the SafeMyKid dashboard from any browser and begin monitoring and controlling website access, app usage, and digital activity in real-time.
While Apple’s Screen Time and Google’s Family Link offer decent website blocking options, they fall short when it comes to advanced monitoring and real-time controls.
SafeMyKid provides a far more complete and flexible solution for digital safety than the built-in parental controls on an iPad.
SafeMyKid’s ease of use and advanced features make it an excellent choice for keeping your child’s browsing safe.
FAQs: How to Block Websites on iPad
Here’s a helpful FAQ section to address common questions about blocking websites on an iPad.
Whether you’re using built-in tools like Screen Time or third-party apps like SafeMyKid, these answers will help you understand the best methods to keep your child’s browsing safe and focused.
1. Why should I block websites on my child’s iPad?
Blocking websites on an iPad ensures your child stays safe from inappropriate, harmful, or distracting content. It helps create a focused browsing environment and prevents exposure to cyber risks like malware, phishing, and online predators.
2. What’s the easiest way to block websites on an iPad?
The easiest way to block websites on an iPad is by using Apple’s built-in Screen Time feature. It allows you to block specific websites, limit adult content, and even restrict browsing to an approved list of sites — all without the need for third-party apps.
3. Can I block entire categories of websites on my iPad?
Yes, but Apple’s Screen Time offers only basic category-based blocking, like limiting adult websites. For more advanced category-based filtering (e.g., blocking gambling, violence, or social media), SafeMyKid is a better option as it provides comprehensive content filtering.
4. Is SafeMyKid compatible with iPad and iPhone?
Yes! SafeMyKid works seamlessly on both iPad and iPhone. You can monitor and control web access across multiple iOS devices using the SafeMyKid Dashboard from any browser.
5. Does SafeMyKid require jailbreaking to block websites on iPad?
No. Unlike some advanced monitoring apps, SafeMyKid works without jailbreaking or rooting your child’s device. This keeps the device’s warranty intact and ensures a secure setup.
6. Is there a risk of my child bypassing website blocks?
It depends on the method used:
- Screen Time: If your child guesses or knows the passcode, they can change the settings.
- Router Settings: These work well but only apply to your home Wi-Fi network.
- SafeMyKid: Offers the most secure and flexible website blocking with remote access and real-time alerts, reducing the risk of bypassing.
7. How do I know which method is best for me?
Choose based on your needs:
- For Basic Website Blocking: Use Screen Time.
- For Network-Wide Filtering: Use your router’s parental controls.
- For Advanced Digital Safety: Go with SafeMyKid for comprehensive monitoring and flexible website blocking.
Conclusion
Learning how to block websites on an iPad is essential for a safe and focused browsing experience. Whether you choose Apple’s built-in Screen Time, router settings, or a powerful third-party app like SafeMyKid, each method has its advantages.
SafeMyKid stands out for its advanced features and ease of use, making it an excellent choice for comprehensive web filtering and monitoring. Choose the method that best fits your needs and enjoy a safer online environment.

